How To Replace AC Capacitor (7 Steps for DIY Reparations)
When your air conditioner refuses to start or struggles to cool your home, a small component might be the culprit. The ac capacitor plays a critical role in powering the motors that run your cooling system. Without it, your air conditioner cannot start or maintain proper operation. Understanding how this component works can help homeowners diagnose issues early. If your system continues to struggle, exploring professional help through trusted heating and cooling solutions can ensure everything runs safely and efficiently.
In this guide, you will learn:
- What an AC capacitor does inside your cooling system
- Warning signs that a capacitor may be failing
- Step by step instructions for replacing a capacitor safely
- When DIY repairs are appropriate and when professional help is better
- Maintenance tips to help prevent capacitor failure
Why the AC Capacitor Is Essential for Your Air Conditioning System

Air conditioners rely on several electrical components to function properly, and the capacitor is one of the most important. It stores electrical energy and releases it to help power the compressor and fan motors.
Without this stored energy boost, the system cannot start efficiently. A faulty capacitor can stop the system from running entirely or cause serious strain on other components.
For homeowners in Fort Mill and surrounding areas, understanding this small but powerful component can make a big difference when troubleshooting cooling issues.
Here are several reasons why this component is so important.
- Startup Power Support
The capacitor delivers the burst of electricity required to start the compressor and fan motors. Without this boost, the motors cannot begin running. - Energy Efficiency
A functioning capacitor helps motors operate smoothly and efficiently. When the capacitor weakens, motors must work harder, increasing energy consumption. - Motor Protection
By regulating electrical flow, the capacitor prevents motors from drawing excessive power. This protection helps reduce wear and extend the lifespan of the system. - System Reliability
A healthy capacitor ensures your cooling system starts quickly and runs consistently, which is especially important during hot summer days.
Because capacitors work during every cooling cycle, they naturally wear out over time. Homeowners in Fort Mill and surrounding areas often experience capacitor issues during peak cooling season when systems run frequently.
7 Steps to Replace an AC Capacitor Safely
Replacing a capacitor can be a manageable DIY repair for homeowners who are comfortable working with electrical components. However, safety is extremely important because capacitors store electricity even after power is disconnected.
Follow these steps carefully to perform the repair safely.
1. Turn Off Power to the AC Unit
Before touching any components, completely shut off power to the system.
Locate the disconnect box near your outdoor unit and switch it off. You should also turn off the circuit breaker connected to your air conditioner at the electrical panel.
Taking both steps ensures no power reaches the unit while you are working.
Important safety tips include:
- Confirm the thermostat is turned off
- Verify the breaker is fully switched off
- Wait a few minutes before opening the unit
Electrical safety should always be the first priority.
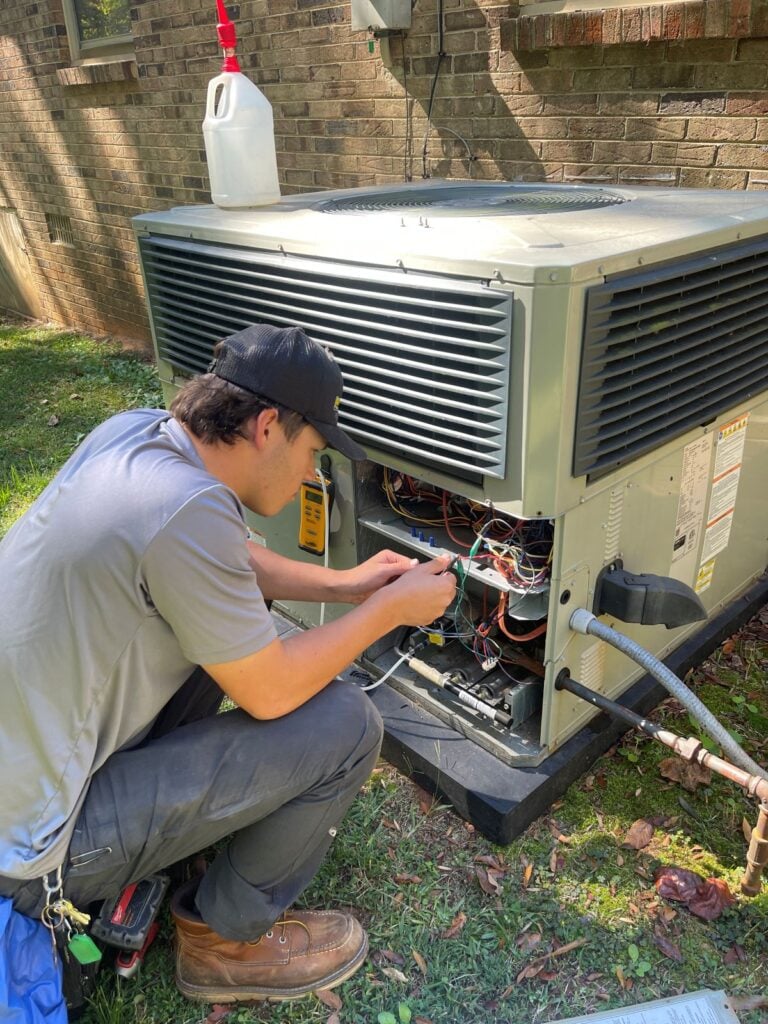
2. Access the Outdoor Condenser Panel
The capacitor is typically located inside the outdoor condenser unit.
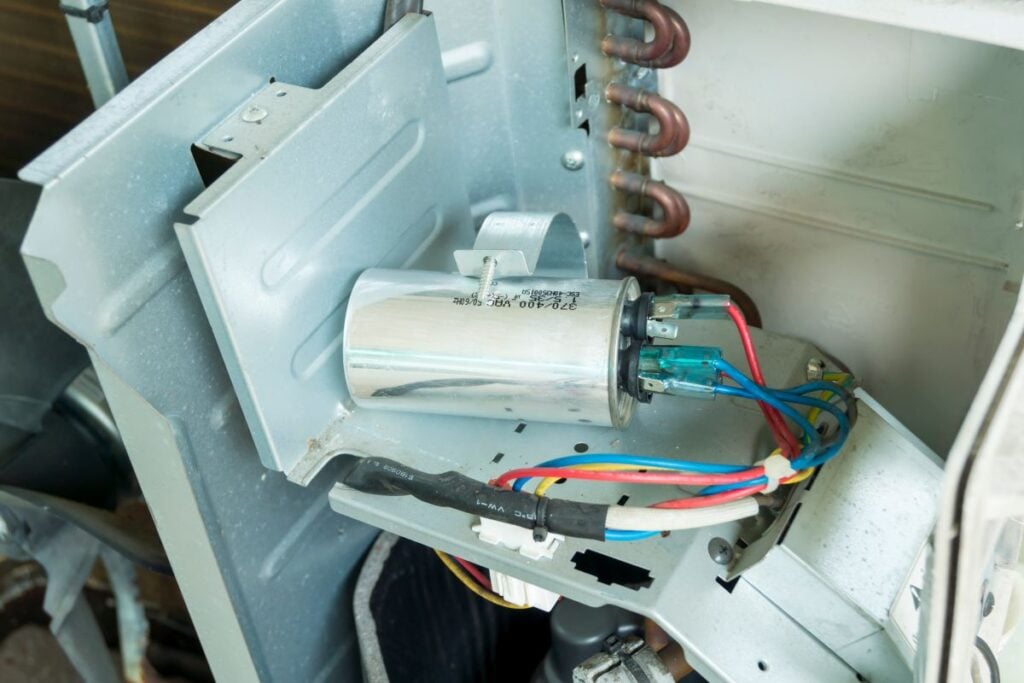
Use a screwdriver to remove the access panel on the side of the unit. Once opened, you will see electrical components including the capacitor and contactor.
The capacitor usually looks like a small metal cylinder or oval can with several wires attached.
Before touching anything, take a clear photo of the wiring setup. This will help ensure proper reconnection later.
3. Discharge the Capacitor
Even after power is shut off, the capacitor may still hold electrical energy. Discharging it prevents accidental shocks.
To safely discharge the capacitor:
- Use an insulated screwdriver
- Touch the metal terminals simultaneously
- Hold for several seconds to release stored energy
Some professionals prefer using a resistor tool designed for capacitor discharge. Regardless of the method, this step is essential before handling the component.
4. Label and Disconnect the Wires
Once the capacitor is safely discharged, you can begin disconnecting the wires.
Capacitors often have three labeled terminals:
- C (Common)
- HERM (Compressor)
- FAN (Fan Motor)
Carefully remove each wire using needle nose pliers. Label them or reference the photo you took earlier to keep track of their original locations.
Avoid pulling wires directly by the insulation. Grip the connector instead to prevent damage.
5. Remove the Old Capacitor
Most capacitors are secured with a mounting bracket.
Use a screwdriver or wrench to loosen the bracket and remove the old capacitor from the unit.
Before installing the replacement, check the capacitor’s rating printed on the side. It will include information such as:
- Microfarad rating (µF)
- Voltage rating
- Model number
The new capacitor must match these specifications exactly to ensure proper operation.
6. Install the New Capacitor
Place the replacement capacitor into the mounting bracket and secure it tightly.
Next, reconnect the wires according to the labels or reference photo. Each wire must return to the correct terminal.
Typical connections include:
- Fan wire connected to FAN
- Compressor wire connected to HERM
- Power wire connected to C
Ensure each connector fits snugly. Loose connections can cause system failure or electrical damage.
7. Restore Power and Test the System
After everything is connected, reinstall the access panel and restore power.
Turn the breaker back on and reconnect the outdoor disconnect switch. Then set your thermostat to cooling mode and observe the system.
Signs of successful replacement include:
- The fan and compressor start immediately
- Air begins flowing through vents
- The system runs smoothly without unusual noises
If the unit still fails to start, additional electrical issues may be present.
Homeowners in Fort Mill and surrounding areas who feel uncertain about this process should consider professional assistance to avoid potential damage.
Signs Your AC Capacitor May Be Failing
Recognizing early symptoms of capacitor failure can prevent unexpected system breakdowns. Capacitors typically weaken gradually before completely failing.
Many homeowners notice subtle changes in system performance before the issue becomes serious.
Here are some common warning signs.
- AC Struggles to Start: If your air conditioner hesitates or struggles to turn on, the capacitor may not be delivering enough power to start the motors.
- Clicking or Humming Sounds: A failing capacitor may cause the compressor to attempt startup repeatedly without success, producing clicking or humming noises.
- Warm Air From Vents: When the compressor cannot start properly, the system may run but fail to cool the air effectively.
- Outdoor Unit Not Spinning: Sometimes the fan inside the outdoor unit stops spinning entirely. In certain cases, gently pushing the fan with a stick may cause it to start temporarily, indicating capacitor weakness.
- AC Randomly Shuts Off: Inconsistent electrical support can cause the system to shut down unexpectedly during operation.
Because these symptoms can overlap with other HVAC problems, proper inspection is often necessary to confirm the issue.
Homeowners in Fort Mill and surrounding areas frequently encounter capacitor failures during extreme heat because systems run continuously during those periods.
DIY Repair vs Professional Service
While capacitor replacement is considered one of the more approachable HVAC repairs, it is not always the best solution for every homeowner.
Understanding when to attempt a repair and when to call professionals can protect both your equipment and your safety.
When DIY Replacement May Be Appropriate
Some homeowners are comfortable performing minor HVAC repairs, especially when proper safety precautions are followed.
DIY replacement may be suitable when:
- The capacitor is visibly swollen or leaking
- The homeowner has electrical safety knowledge
- The correct replacement part is available
- The system is otherwise functioning normally
In these cases, replacing the capacitor may quickly restore cooling performance.
When Professional Service Is Recommended
In many situations, professional diagnostics are the safest choice.
Professional service is recommended when:
- The system continues failing after capacitor replacement
- Electrical wiring appears damaged
- The compressor is not responding
- The homeowner is unsure about electrical work
Experienced technicians have specialized tools that allow them to test capacitors, motors, and control boards accurately.
Risks of Improper Installation
Installing the wrong capacitor or wiring it incorrectly can lead to serious consequences.
Possible risks include:
- Compressor damage
- Electrical shorts
- Motor burnout
- System failure
Because compressors are among the most expensive HVAC components, proper installation is critical.
Preventative Maintenance to Reduce Capacitor Failures
Capacitors often fail due to heat, electrical stress, or aging components. Routine maintenance can help reduce these risks.
Preventative steps include:
- Scheduling annual HVAC inspections
- Cleaning debris around the outdoor unit
- Replacing air filters regularly
- Monitoring unusual system sounds
These small steps can help extend the life of multiple HVAC components.
Restore Reliable Cooling With Expert Help
The capacitor may be a small part of your air conditioning system, but it plays a major role in keeping your home comfortable. When it fails, your AC may struggle to start, run inefficiently, or stop working entirely.
Learning how to identify capacitor problems and replace the component safely can help homeowners address minor issues before they become major repairs. However, electrical components require careful handling, and professional service is often the safest path when problems become complicated.
If your air conditioner is showing signs of electrical trouble or refuses to start, the experienced team at Panther HVAC is ready to help homeowners in Fort Mill and surrounding areas restore dependable cooling. Whether you need diagnostics, repairs, or maintenance, our technicians are here to keep your system operating at its best. For expert assistance with your cooling system, contact us today and let Panther HVAC help you stay comfortable year round.
